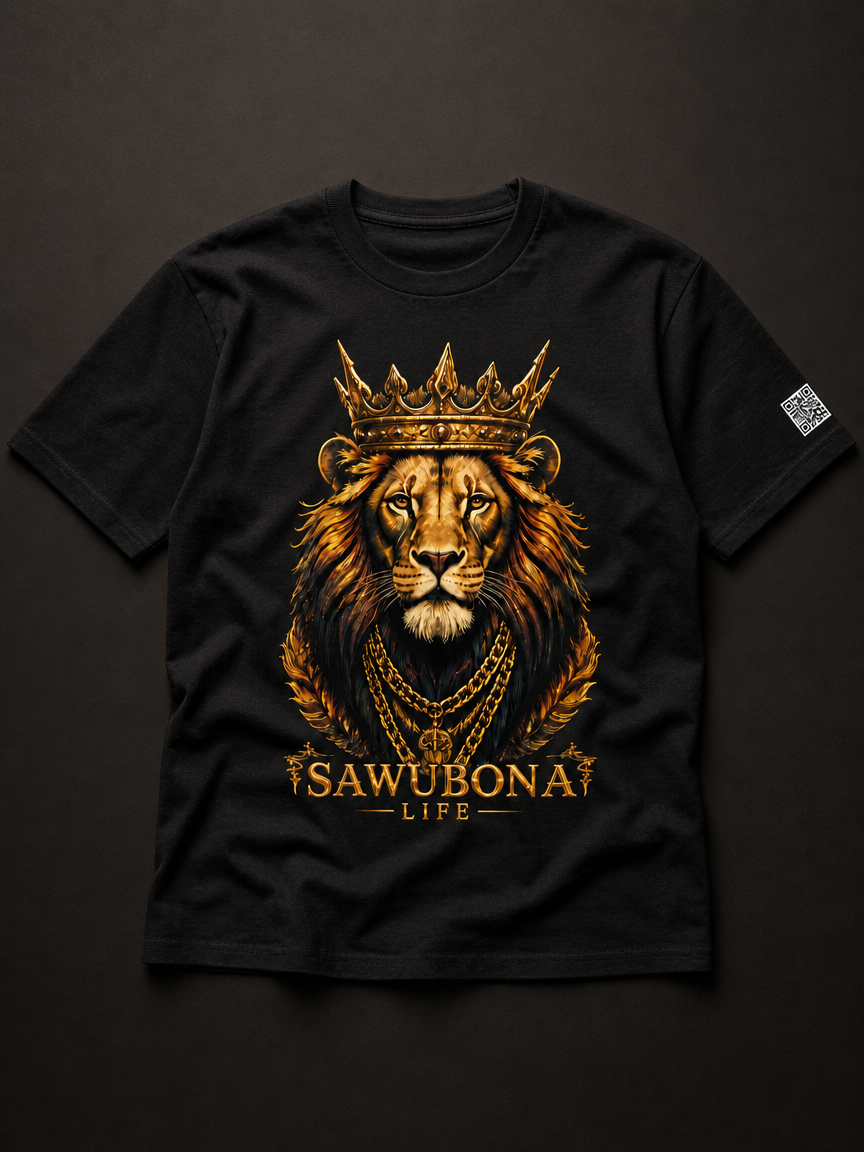
Tagless, 100% Cotton Majestic Lion Unisex Tee - Affirmation Apparel by Sawubona Life
Start with a Trigger Test, not a Shopping Cart
Sawubona. In the isiZulu tradition, it means "I see you," and it is the right place to begin any guide on how to find sensory-safe clothing. Because the search does not start in a store. It starts with you, and with the specific things your body notices. This guide from Sawubona Life covers a repeatable method for finding clothes that work, rather than a list of items to buy and hope for the best.
Sensory-safe clothing is apparel chosen to reduce unpleasant physical input, such as scratchy fabric, bulky seams, tight waistbands, and scratchy labels. The goal is simple: fewer interruptions between you and your day.
Most shopping advice gets this backwards. It hands you a brand name before you know what you are avoiding. A shirt can be soft and still fail, because the tag on the side seam ruins it. A fabric can feel lovely in your hand and feel wrong after twenty minutes against your skin.
Below, we walk through a short trigger test, then the fabrics, seams, and fits that tend to work. You will also get a shopping checklist you can carry into a store or use online.
What Sensory-Safe Clothing Actually Means
Sensory-safe clothing is clothing selected to match one person's sensory processing, not a universal standard. That distinction matters. Two people with the same diagnosis can need opposite things from a shirt.
Sensory processing is how the nervous system takes in and organizes touch, pressure, temperature, and texture. When that input arrives louder or messier than usual, clothing becomes a constant background task. NIH overview of sensory processing
So "sensory-friendly" on a label is a starting point, not a promise. What counts is whether a garment removes the specific inputs that bother you.
Soft, breathable fabric with no scratch
Flat seams or none at all
No tags at the neck or side
A fit that does not grip or ride up
Fasteners you can manage without a fight
Map Your Sensory Triggers Before You Buy
Before you spend anything, spend ten minutes writing down what your body rejects. A common mistake is buying a "sensory-friendly" item and discovering the problem was never the fabric. It was the collar, the waistband, or the way the sleeve hem rubbed.
Most guides stop at a list of triggers. What they miss is a repeatable method you can use on any garment, in any setting, to figure out what actually bothers you. Use this four-step process: observe, record, test, and adjust.
Step 1: Observe Without Judgment
Put on an outfit you already own and go about your normal routine for an hour. Carry a small notebook or use your phone's notes app. Every time you touch, tug, or shift your clothing, write down the time and what you did. Do not try to fix it yet. Just notice.
Common observations include:
Pulling at a neckline
Tugging a hem down
Shifting a waistband
Rolling up sleeves that feel too long
Adjusting a collar that rubs
These micro-adjustments are data points. They tell you exactly where the friction is.
Step 2: Record the Specifics
After the hour, review your notes and sort each observation into three buckets: texture, pressure, and construction. Be as specific as possible. "The tag on the left side of my neck" is more useful than "the shirt felt scratchy." "The waistband dug in when I sat down" is more useful than "the pants were tight."
Use this table to organize what you find:
Keep this list on your phone. It turns a vague feeling into a shopping filter.
Step 3: Test One Variable at a Time
When you try a new garment, change only one thing at a time. If you switch from a tagged to a tagless shirt and also change the fabric, you will not know which change helped. Start with the garment that most closely matches your current wardrobe, then adjust one feature.
For example, if your trigger list says neck tags are a problem, first try a tagless version of a shirt you already like. If that works, you have confirmed the tag was the issue. If it still bothers you, the problem may be the seam or the fabric, and you can test those next.
Step 4: Adjust and Re-Test
Sensory needs change. A fabric that worked last year may irritate now, and the reverse happens too. Revisit your trigger list every few months, or whenever you notice a new pattern of discomfort. The goal is not a permanent answer but a current one.
The 10-Minute Wear Test
The 10-minute wear test is a simple check: put the garment on and do normal things for ten minutes before you commit. Sit down. Reach overhead. Roll your shoulders. Bend at the waist.
Watch for three signals:
The instant flinch. If it bothers you in the first thirty seconds, it will not improve.
The slow burn. Some fabrics feel fine at first and turn irritating as your skin warms.
The adjustment habit. If you keep touching it, your body is already telling you something.
In a store, do this before you reach the register. Online, wear it indoors for ten minutes with the tags still attached so you can return it.
Pro Tip: Test new clothes at the end of the day, not the morning. Sensory tolerance is often lower when you are tired, so a garment that passes then will pass on a good day too.
Soft Fabrics for Sensitive Skin: What to Look For
Soft fabrics for sensitive skin share a few traits: a smooth surface, some breathability, and no stiff finish. Texture is the most common trigger, so fabric choice does a lot of the work.
Here is how the main options compare.
A few practical notes. Cotton is the safest starting point for many people, and a well-washed cotton tee softens over time. Modal and bamboo feel smooth against the skin and drape loosely, which helps if pressure is a trigger. Merino wool is fine for some and impossible for others, so treat it as a test, not a default. Moisture-wicking fabrics help if heat or sweat bothers you, but check for cling.
What most guides miss: fabric softness in the hand is not the same as softness on the skin. A brushed interior can feel wonderful and still have a rough seam.
Seams, Tags, and Labels: The Details That Decide Comfort
Seams, tags, and labels decide comfort more often than fabric does. A soft shirt with a stiff neck tag is a bad shirt. This is the detail most shoppers skip, and it is the one that ruins the most promising purchases.
Check these spots in order:
The neck label. Printed or tagless beats a sewn tag every time.
The side seam. Run a finger along the inside. If you feel a ridge, you will feel it all day.
The shoulder seam. Flat or lapped seams sit lower and rub less.
The hem. A raw or bonded hem can be smoother than a folded and stitched one.
Tagless clothing removes one whole category of irritation. If a garment still has a tag, cut it close but not through the stitching, or look for a brand that prints the label directly on the fabric.
Watch Out: Cutting a tag too close can leave a stiff stub of label that scratches worse than the original. Cut between the stitches, leaving a small soft border, or choose tagless construction from the start.
Why Tagless Clothing for Adults Changes the Daily Equation
Tagless clothing for adults matters because the neck tag is a small, constant input you cannot escape. It sits against the most sensitive skin on your upper back, and it moves every time you turn your head.
For kids, parents often cut tags out. Adults are expected to just tolerate them. That expectation is the problem. A tag you notice at 8 a.m. is a tag you notice at 3 p.m., and the cumulative cost shows up as fatigue and short temper.
Tagless construction solves it at the source. The label is printed into the fabric or left off entirely, so there is nothing to scratch and nothing to cut.
This is where Sawubona Life puts its attention. Our tees are built tagless and ultra-soft, with a fit that stays put without gripping. One customer with sensitive skin put it plainly, "finding shirts that do not irritate me is a boon." Another noted the fabric "feels soft and good quality" and held up after washing.
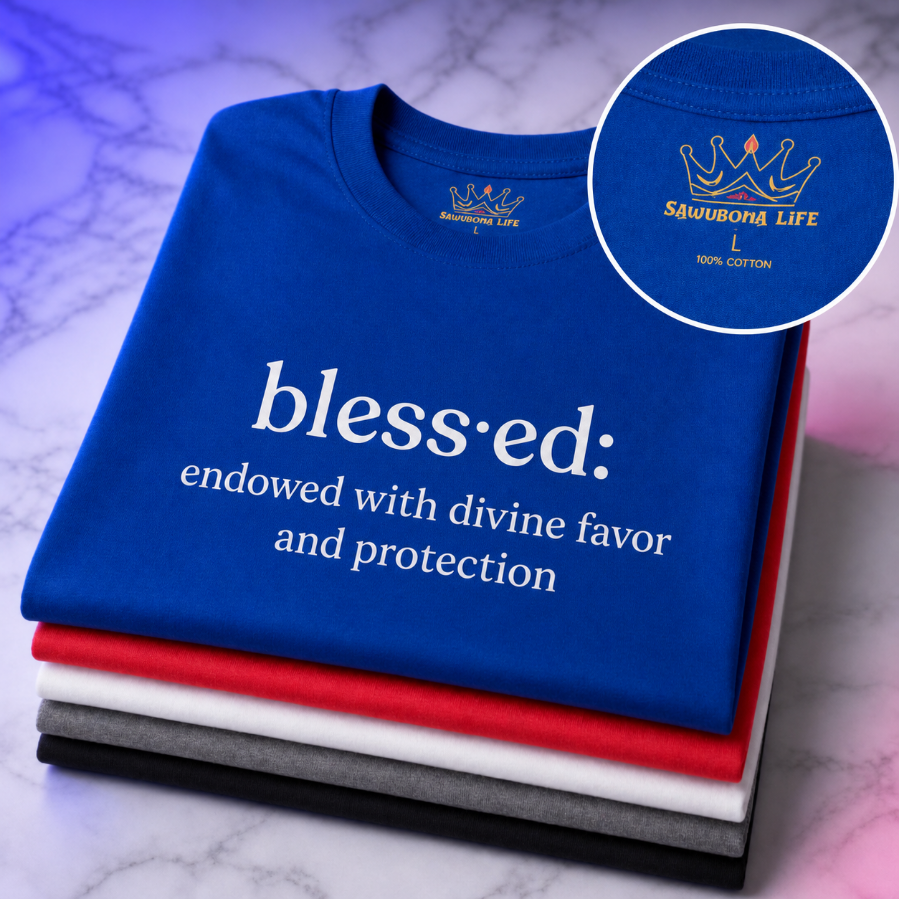
Folded Blessed Unisex Graphic Tees That are 100% Cotton and Tagless - Affirmation Apparel by Sawubona Life
Seamless Clothing for Sensory Issues: Fit, Pressure, and Compression
Seamless clothing for sensory issues targets the second big trigger: pressure. Seams create ridges, and ridges create rub points. Removing them helps, but fit does just as much.
Fit is a balance. Too loose and the fabric shifts and bunches. Too tight, and every edge becomes a pressure point. The sweet spot is close enough to stay in place and loose enough to forget.
Compression is its own category. Some people find gentle compression calming, because deep pressure can feel organizing rather than irritating. Others find any squeeze unbearable. Neither response is wrong.
If pressure calms you, look for gentle compression tops or snug base layers.
If pressure bothers you, choose loose fit, soft waistbands, and roomy sleeves.
If it changes by the day, build in options, and keep both a loose and a snug piece on hand.
The mistake is assuming one answer fits all sensory profiles. It does not.
Sensory-Friendly Clothing Shopping Tips for In-Store and Online
Good sensory-friendly clothing shopping tips come down to testing before you commit. In a store, you can feel the fabric and check the seams. Online, you have to read the details and use the return window. Most guides give you a short list; this one gives you a full inspection routine for both settings.
In-Store Inspection: What to Check and How
When you are in a store, you have the advantage of touch. Use it systematically. Start with the inside of the garment, not the outside. The inside is what touches your skin.
1. Check the neck label. Look for a sewn tag. If there is one, feel it. Is it stiff or soft? Can it be cut out without leaving a stub? Printed or tagless labels are better.
2. Run a finger along every seam. Start at the shoulder, move down the side, and check the hem. You are feeling for ridges, lumps, or stiff stitching. Flat seams or bonded seams are smoother than standard overlocked seams.
3. Feel the fabric against your inner wrist. Your wrist is more sensitive than your palm. Rub the fabric there. Does it scratch? Does it cling? Does it feel cool or warm?
4. Check the fasteners. Buttons, zippers, and snaps can poke or press. Look for covered buttons, flat zippers, or snaps that are smooth on the inside.
5. Do the 10-minute wear test. Put the garment on and move around. Sit, reach, bend. Notice any adjustment you make.
6. Note the fabric content. Read the label. Cotton, modal, and bamboo are common starting points. Synthetics vary widely. If the label is missing, ask a staff member or check online.
Use this checklist in the fitting room:
Neck label is printed or tagless
Seams feel flat when you run a finger inside
Fabric feels smooth against your inner wrist
Fasteners are smooth on the inside
You can sit, reach, and bend without adjusting
Fabric content is listed and matches your trigger list
Online Shopping: How to Read Descriptions and Evaluate Return Policies
Online shopping removes touch, so you have to rely on words and policies. Start with the product description. Look for specific terms: "tagless," "printed label," "flat seams," "seamless," "soft," "brushed." Be wary of vague claims like "sensory-friendly" without details.
Read the fabric composition. Look for percentages. A shirt that is 95% cotton and 5% spandex will feel different from 100% cotton. Check the weight if listed; lighter weights tend to be softer and more breathable.
Check the return policy before you order. You need to know if you can return worn items. Some retailers allow returns within 30 days if tags are attached; others require unworn condition. Read the fine print. If the policy is unclear, contact customer service.
Order one piece first. A single test purchase tells you more about a brand's fabric and fit than a dozen reviews. Wear it indoors for ten minutes with tags attached. If it fails, return it.
Look for reviews that mention sensory details. Search reviews for words like "tag," "seam," "soft," "itch," and "pressure." These give you real-world information that the product description may omit.
Use this checklist for online orders:
Description uses specific terms (tagless, flat seams, etc.)
Fabric composition and weight are listed
Return policy allows trying on and returning
Reviews mention sensory details
You order one piece first
You test indoors with tags attached
Pro Tip: Buy one item first. A single test purchase tells you more about a brand's fabric and fit than a dozen reviews, and it keeps the return simple if it fails.
What to Do When You Cannot Try It On
If you cannot try a garment on because it is online or the store does not have a fitting room, use these workarounds:
Order two sizes. Order the size you think you need and one size up. Return the one that does not work.
Check the return window. Make sure you have enough time to test at home.
Wear it indoors first. Keep tags on and wear it for ten minutes before removing tags.
Contact customer service. Ask specific questions about seams, tags, and fabric feel.
This routine turns a guessing game into a repeatable process.
Low-Cost Adaptations, Care, and Changing Sensitivities
You do not need a new wardrobe to get relief. A few low-cost changes handle a lot of triggers.
Cut tags between the stitches, not through them.
Wash new clothes twice to soften stiff finishes.
Turn garments inside out to reduce pilling on the outer face.
Swap scratchy elastics for softer ones or size up a waistband.
Layer a soft base tee under anything rough.
Skip fabric softener if scent or residue bothers you.
Care matters for durability, too. Wash in cool water and skip the dryer on high heat, which stiffens cotton and shrinks fit. A garment that stays soft after twenty washes is worth more than one that feels perfect once.
Sensitivities also change. A fabric that worked last year may irritate now, and the reverse happens too. Keep your trigger list current, and re-test rather than assuming.
Frequently Asked Questions
What clothing features make clothes more comfortable for sensory sensitivities?
Look for flat seams or no seams at all, tagless necklines, and soft fabrics such as cotton, modal, or bamboo blends. Loose fits reduce pressure points, and covered elastic waistbands sit better than exposed bands. Check that the fabric has some stretch so it moves with you instead of pulling. Before buying, turn the garment inside out and run your hand along every seam, hem, and label area. If anything feels scratchy against your fingertips, it will likely feel worse against your skin during a full day of wear.
How can I tell whether a fabric will feel comfortable before buying it?
Read the fiber content and weight first, then use the inside-out check. Rub the fabric between your fingers, press it against your inner wrist or neck for 30 seconds, and look at how the seams are finished. Online, look for close-up photos of the interior, ask customer service for fabric weight and composition, and check the return policy before ordering. Ordering one item before buying multiples lowers the risk. A fabric that feels smooth on your wrist but has a stiff printed label will still irritate, so check both texture and construction.
Do people with ADHD have sensory issues with clothes?
Many people with ADHD report tactile sensitivity and distraction from clothing, though the experience varies widely. A waistband that digs in, a tag that scratches, or a fabric that traps heat can pull attention away all day. The practical approach is the same as for anyone with sensory processing differences: identify your specific triggers, test one variable at a time, and keep a short list of fabrics and constructions that work. Individual differences matter more than any label, so treat generic advice as a starting point and adjust based on what your own body reports.
The Bottom Line
Finding sensory-safe clothing is a skill, and like any skill, it improves with practice. Start with your triggers, test before you commit, and check the seams and tags that most shoppers ignore.
At Sawubona Life, we build the details in from the start: ultra-soft, tagless apparel with a fit that does not fight you, made by a Black, women-owned brand rooted in the Zulu philosophy of mutual recognition. Our pieces carry subtle sleeve QR codes as quiet reminders that your presence matters.
Ready to build a wardrobe that respects your sensory needs? Shop Now and find your everyday anchor.
KNOW YOUR TRIGGERS.
SELF-CARE IS NOT SELFISH.
YOUR COMFORT IS A PRIORITY. SAWUBONA!